Constructor.io integration
On this page we'll walk you through an example of setting up customizable webhooks to connect Dynamic Content with Constructor.io. When the user creates or updates a content item in Dynamic Content, all related data will be sent to the Constructor.io dashboard.
This example demonstrates:
- Setting up your Constructor.io account token and key
- Creating a webhook in Dynamic Content that allows data to be sent to your Constructor.io dashboard
- Using the custom payloads feature to send data in the format defined by Constructor.io
We'll walk you through setting up and testing out this example integration step by step.
Pre-requisitesLink copied!
- A Constructor.io account
- A Dynamic Content account with the developer role assigned for the hub in which you want to create a webhook
Before you begin: configure your account credentialsLink copied!
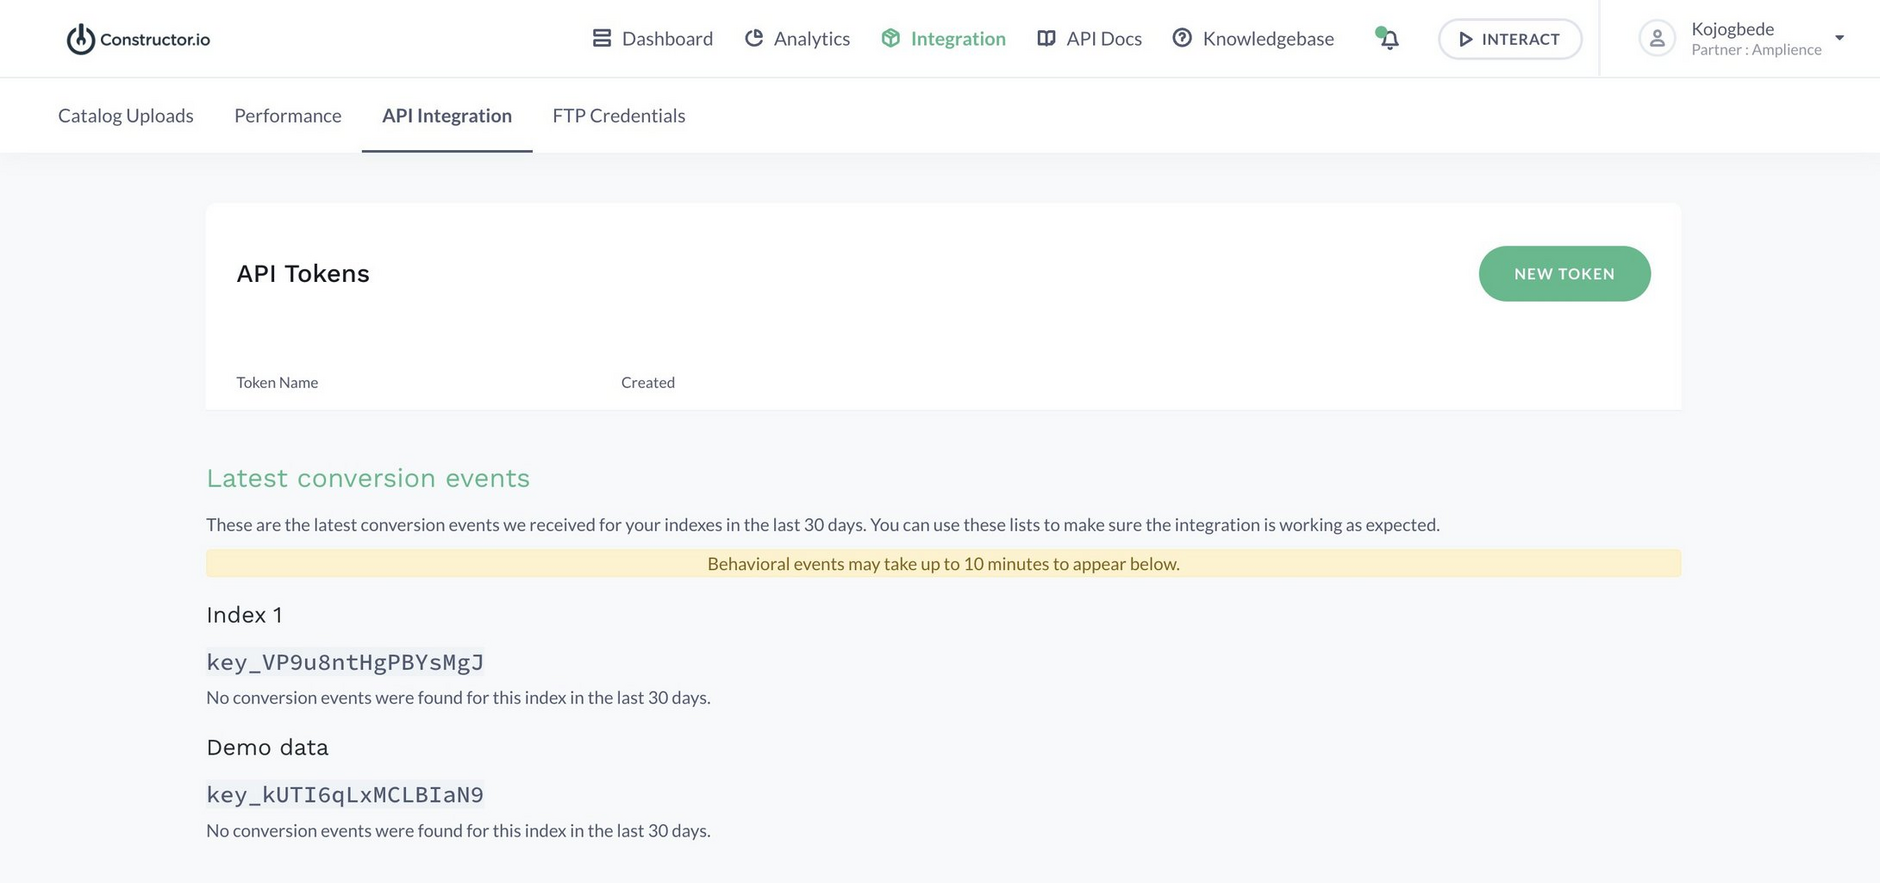
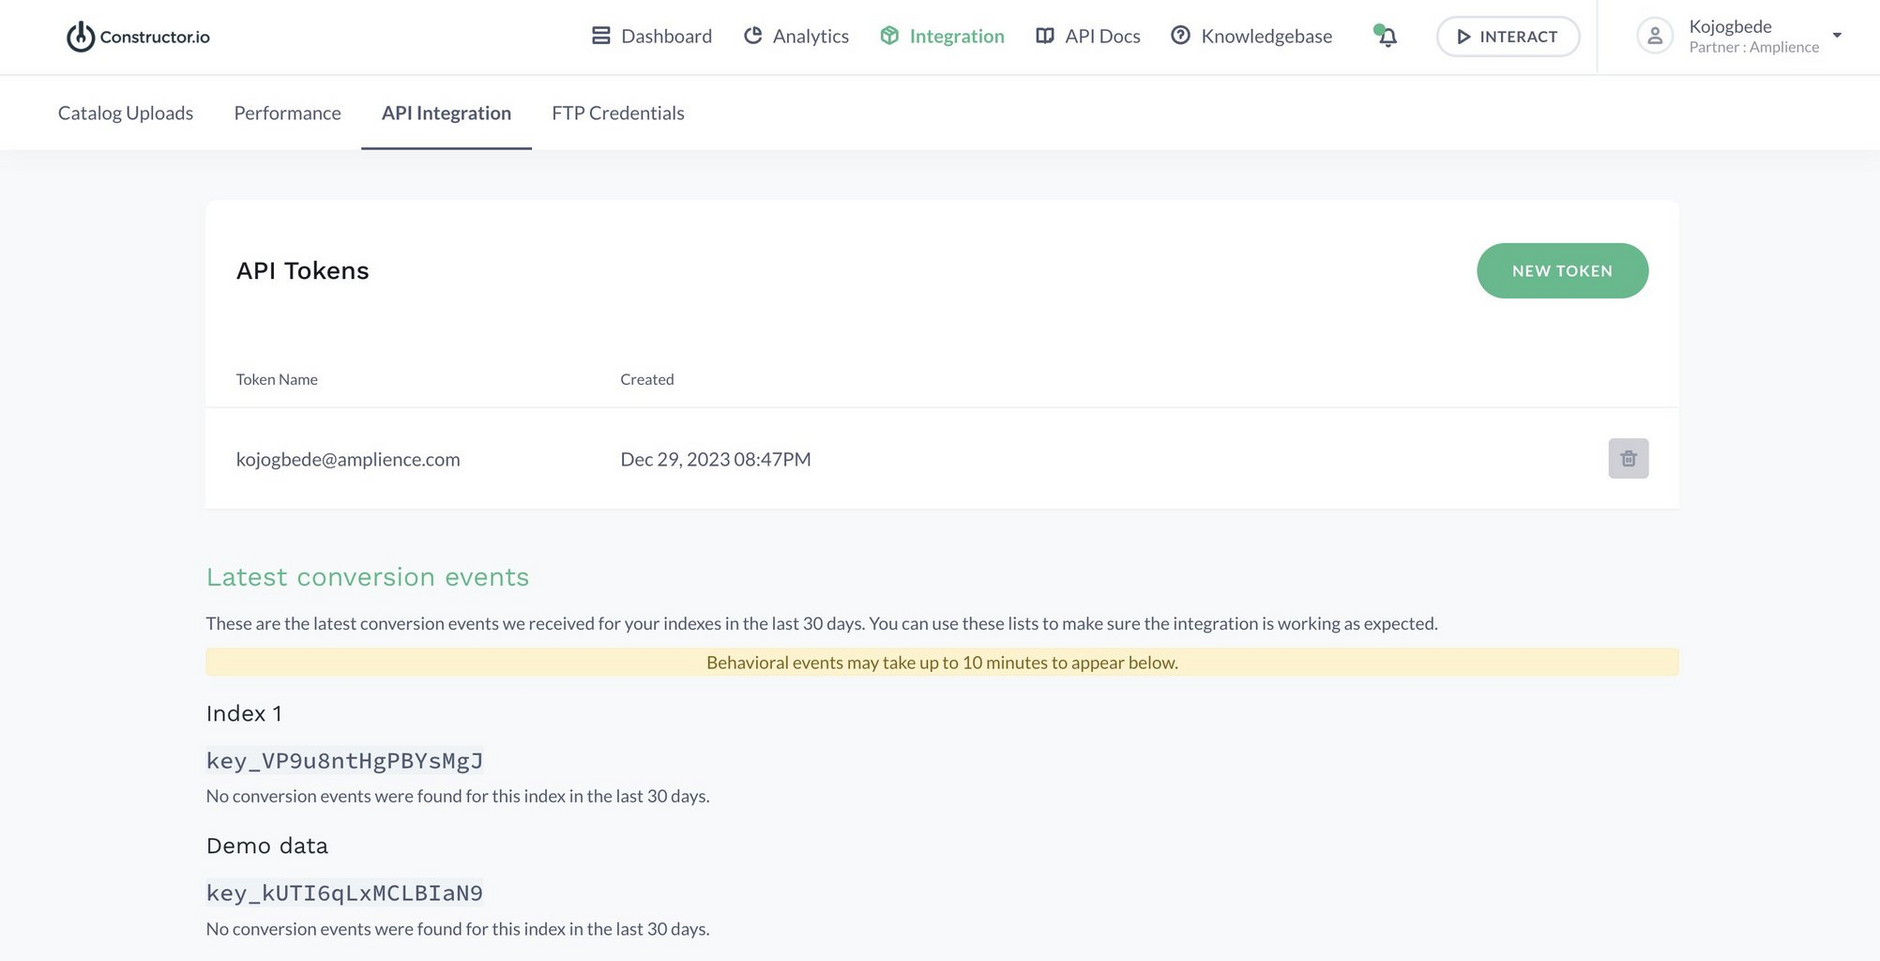
You can generate a new auth token and auth key by navigating to Integration > API Integration in your Constructor.io dashboard. In the API Tokens section, click the 'new token' button in the upper right corner.
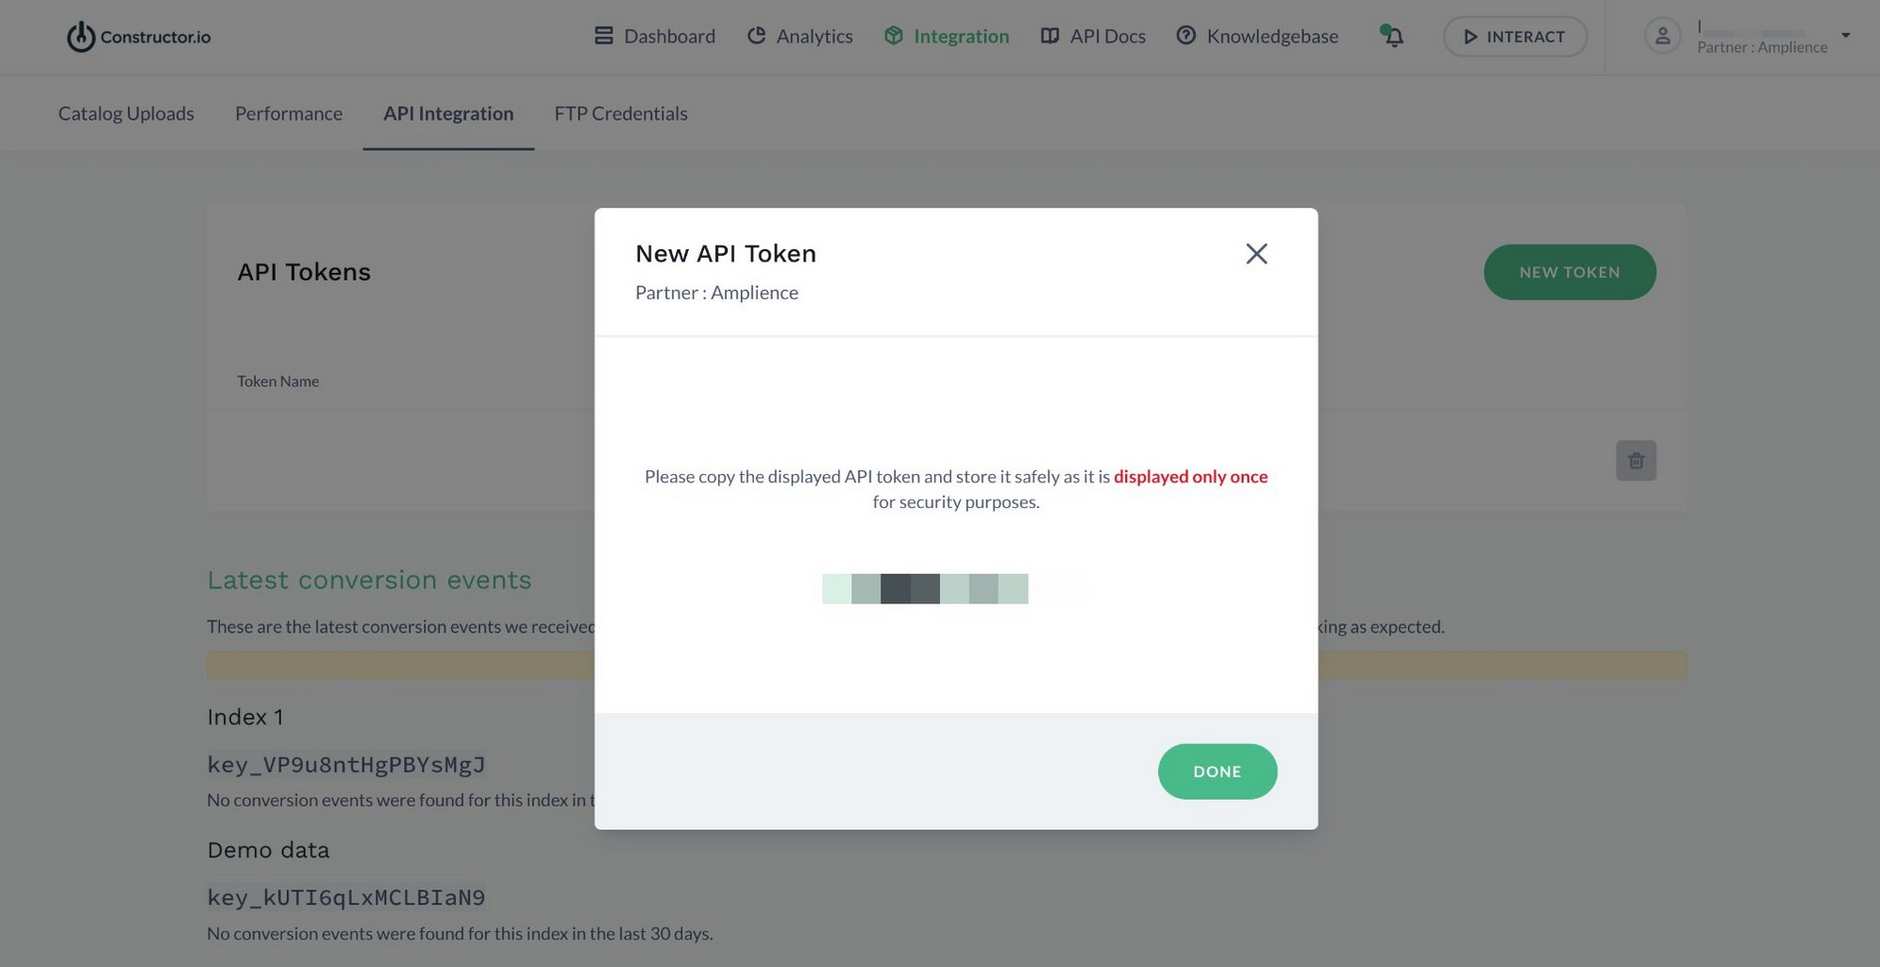
Your secret API token is displayed in a dialog. This is displayed once for security purposes, and must be copied to reuse later when creating a webhook. To generate another API token, navigate back to Integration > API Integration and click 'new token'.
To retrieve the API key, scroll down to Latest conversion events. For example, in the screenshot below, we have our two API keys to use. We will be using the Demo data hub, so we copy key_kUTI6qLxMCLBIaN9.
Convert API Token to Base64Link copied!
You must convert your API token to Base64 before creating a webhook for Constructor.io.
This is because the format of the Constructor.io authentication is username:password, where username is a Base64 encoded API token and password is blank. Therefore, when supplying your authentication credentials, the format would be Base64 API token: with no password following it.
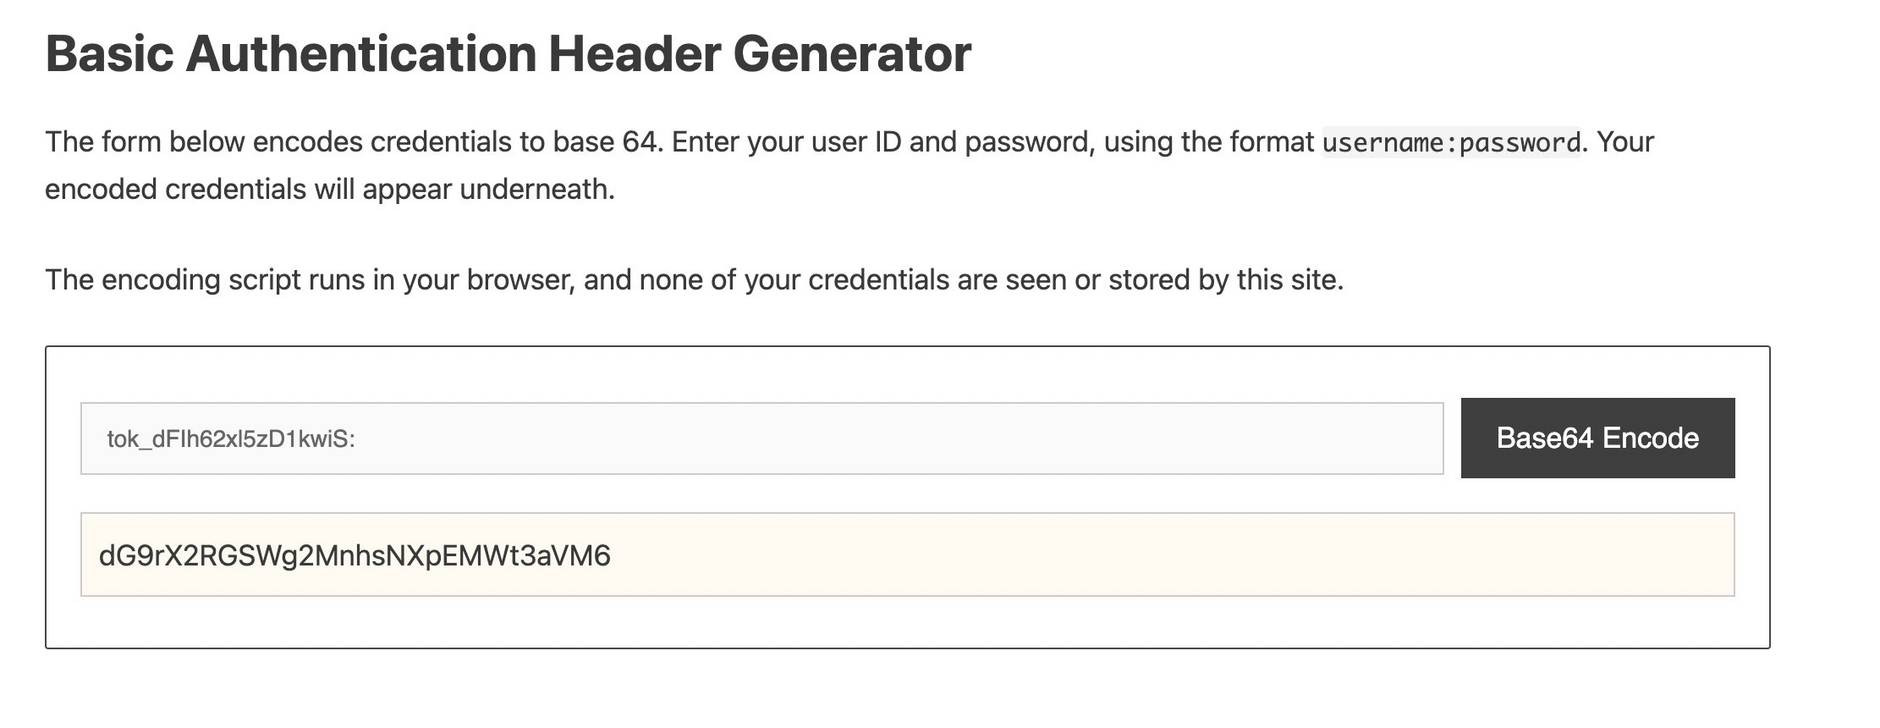
To convert your API token to Base64, use any basic authentication header generator. Paste in your API token followed by a single colon, then generate your Base64 encoded token. The following screenshot shows this process using an example token.
If our token was tok_dFIh62xl5zD1kwiS for example, we would add a colon to the end to make it tok_dFIh62xl5zD1kwiS:. After pasting that into a basic authentication header generator, the Base64 encoded version would be dG9rX2RGSWg2MnhsNXpEMWt3aVM6.
Step 1: Create a webhookLink copied!
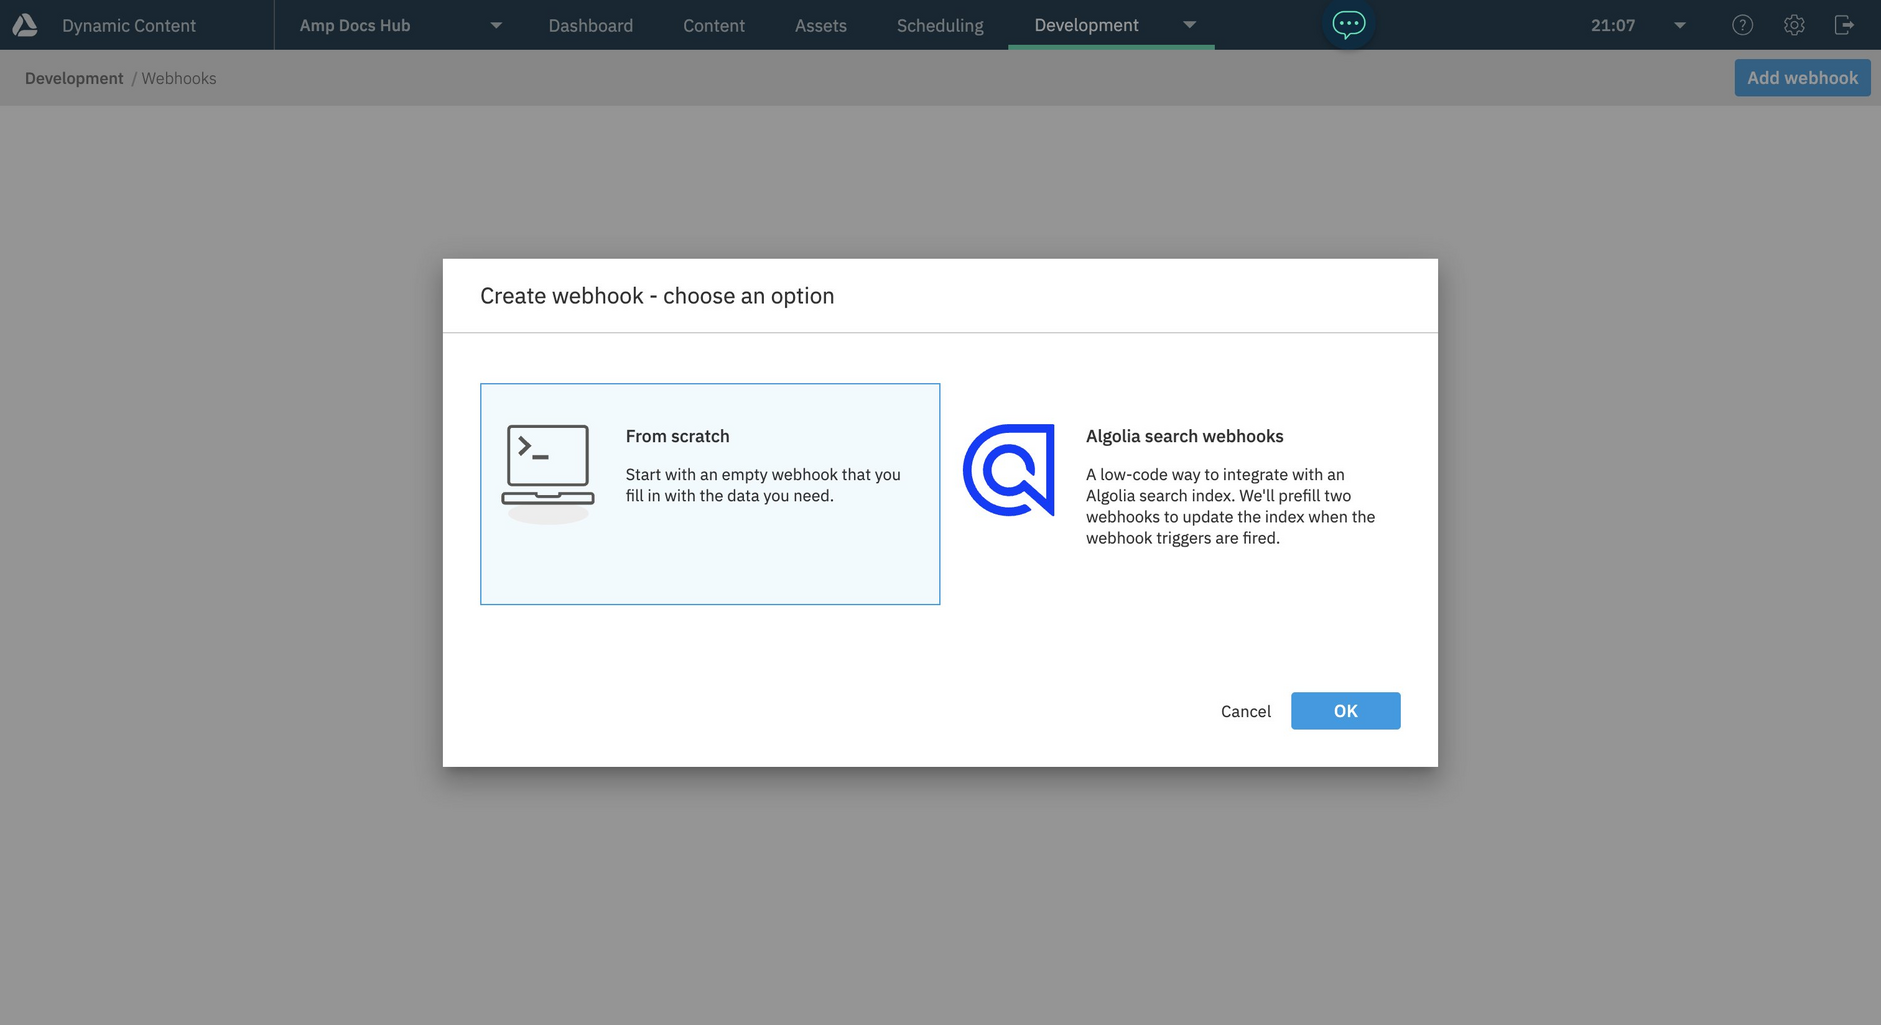
From Dynamic Content, choose "Webhooks" from the Development menu, click "Add webhook" then "From scratch".
You'll be taken to your webhook settings where you can give the webhook a label and paste the webhook URL below into the URL field.
https://ac.cnstrc.com/v2/items?key=YOUR_API_KEY§ion=Content&on_missing=CREATE
Make sure to replace YOUR_API_KEY with the API key you copied from your Constructor.io dashboard. An example of the format is shown below:
https://ac.cnstrc.com/v2/items?key=key_kUTI6qLxMCLBIaN9§ion=Content&on_missing=CREATE
Step 2: Select a trigger and add headersLink copied!
Select a trigger in the webhook triggers grid, which details the action that will trigger the content data to be sent to your Constructor.io dashboard.
In the screenshot above, we have ensured that our Constructor.io dashboard will be updated whenever content is created or updated in Dynamic Content.
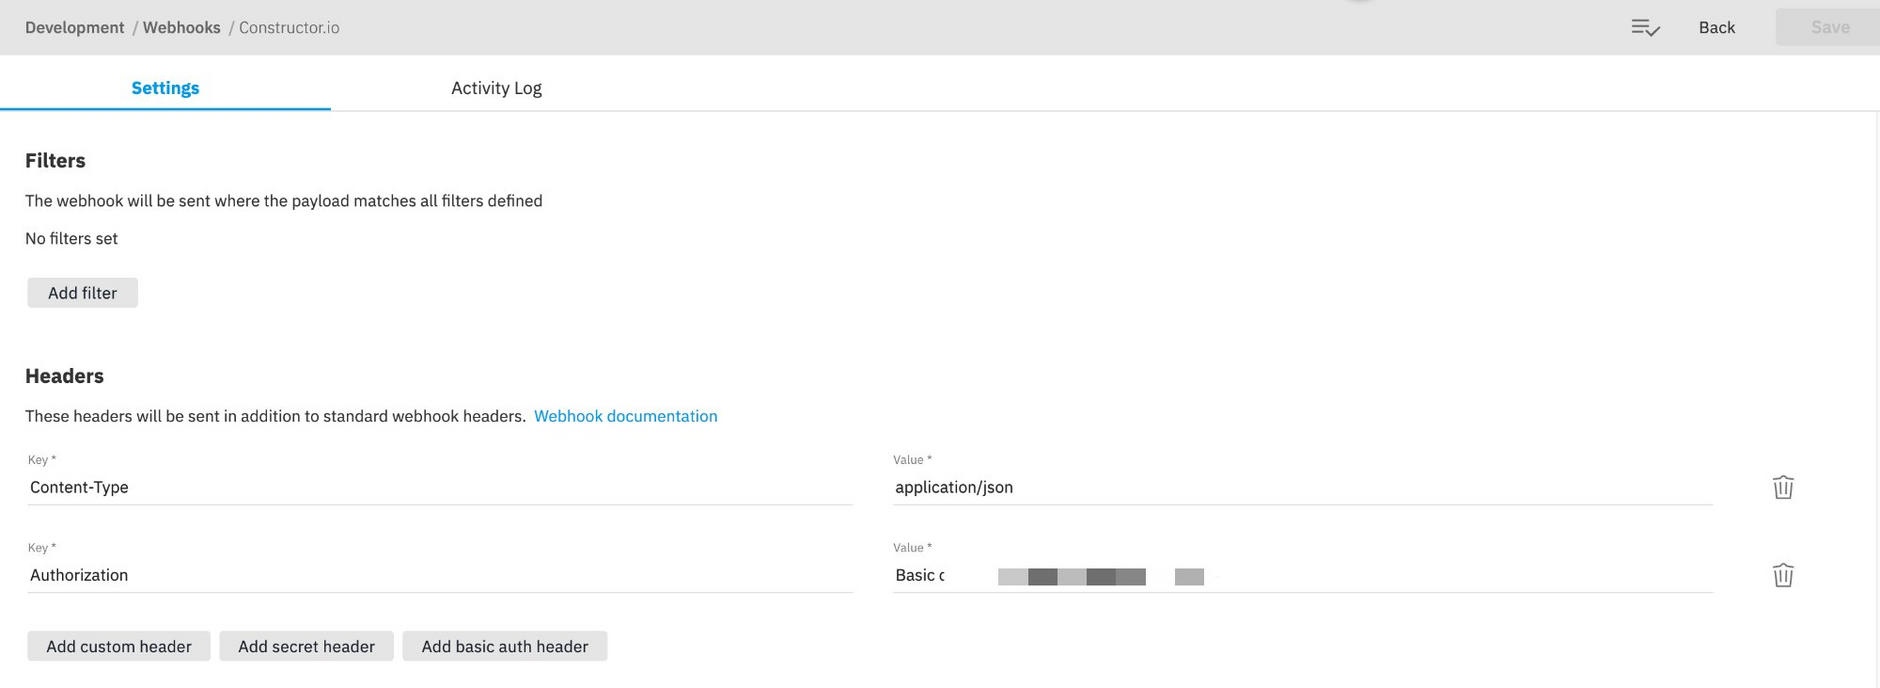
In the headers section, click add custom header. Enter the label and value credentials as follows then click OK:
- Key:
Content-Type - Value:
application/json
Once you have done this, click "add custom header" again. Now enter the label and value credentials as follows:
- Key:
Authorization - Value:
Basic [your Base64 encoded API Token]
Remember to add the word "Basic" before your Base64 encoded token. For example, if your Base64 encoded API token is dG9rX2RGSWg2MnhsNXpEMWt3aVM6 the value for your authentication header will be: Basic dG9rX2RGSWg2MnhsNXpEMWt3aVM6.
Step 3: Create a custom payloadLink copied!
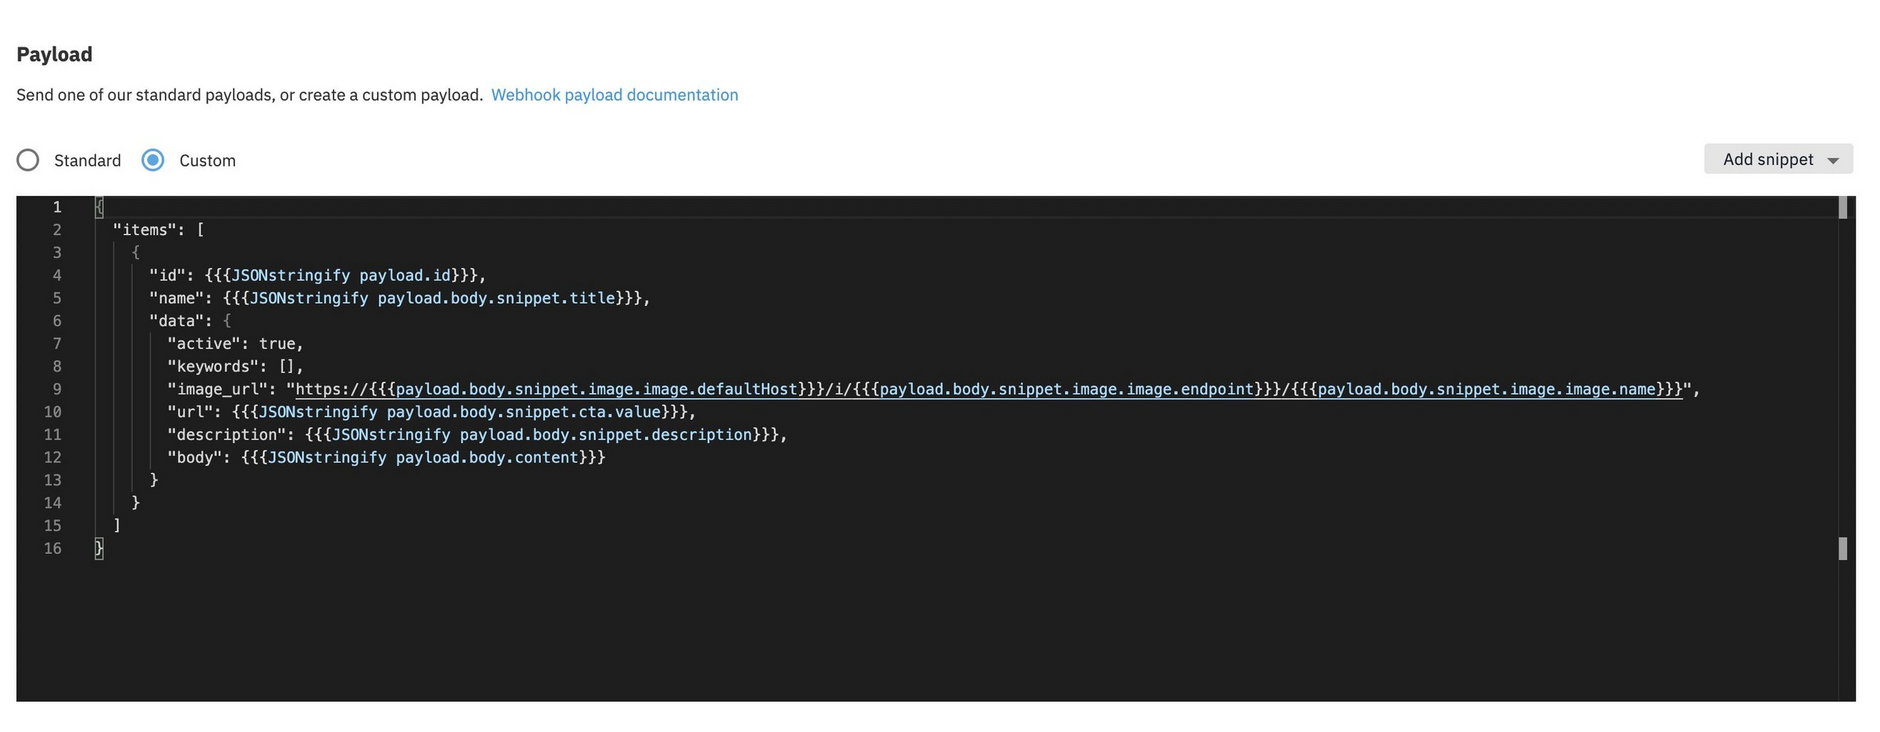
In this example, we are creating a custom payload for when an Accelerator blog post content item is either created or updated. So we paste the below code snippet into the payload area, ensuring we have selected custom.
This custom payload maps the content type for a Accelerator blog post only. If you're using a different content type, you'll need to adjust the payload accordingly. You can view the expected data format in Constructor.io to help you in adjusting your custom payload.
Step 4: Trigger the webhookLink copied!
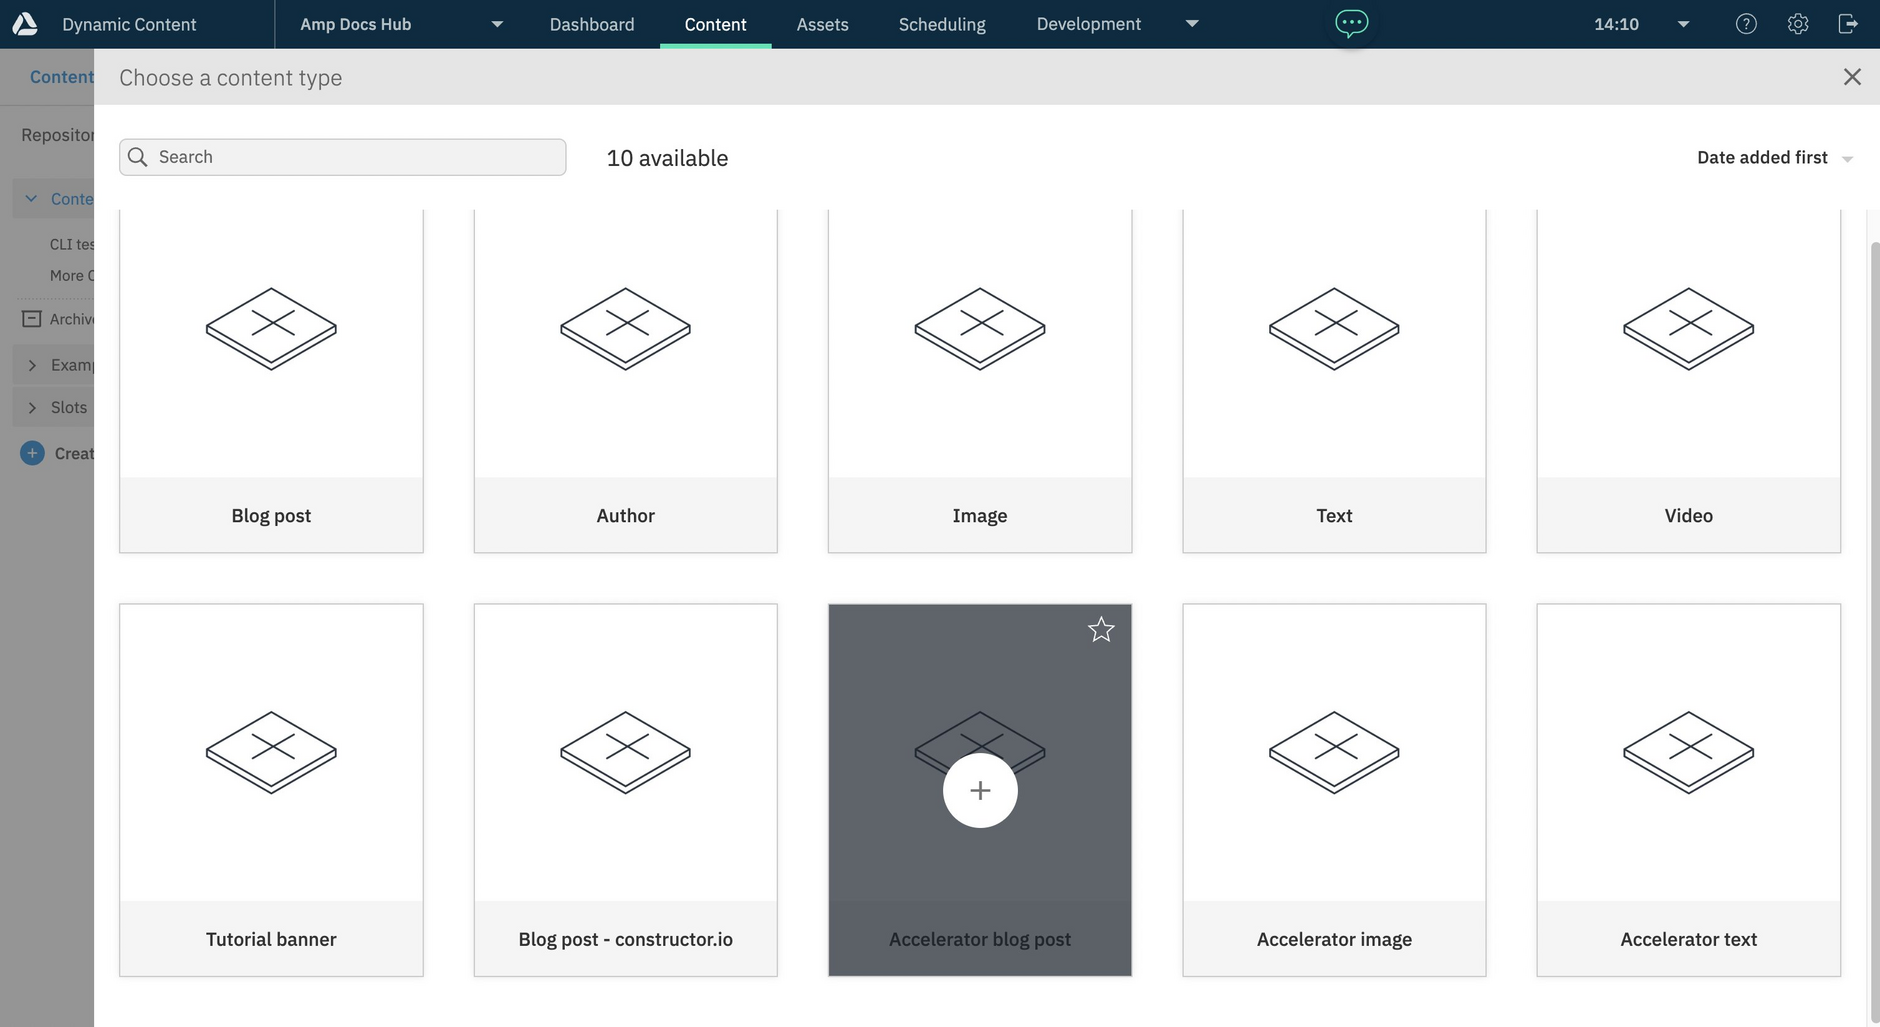
Once the above steps are completed, save your webhook and navigate to the Content tab to create a new content item. Click "Create content" in the top right of the window, and choose a content type. In this example, we are creating an Accelerator blog post.
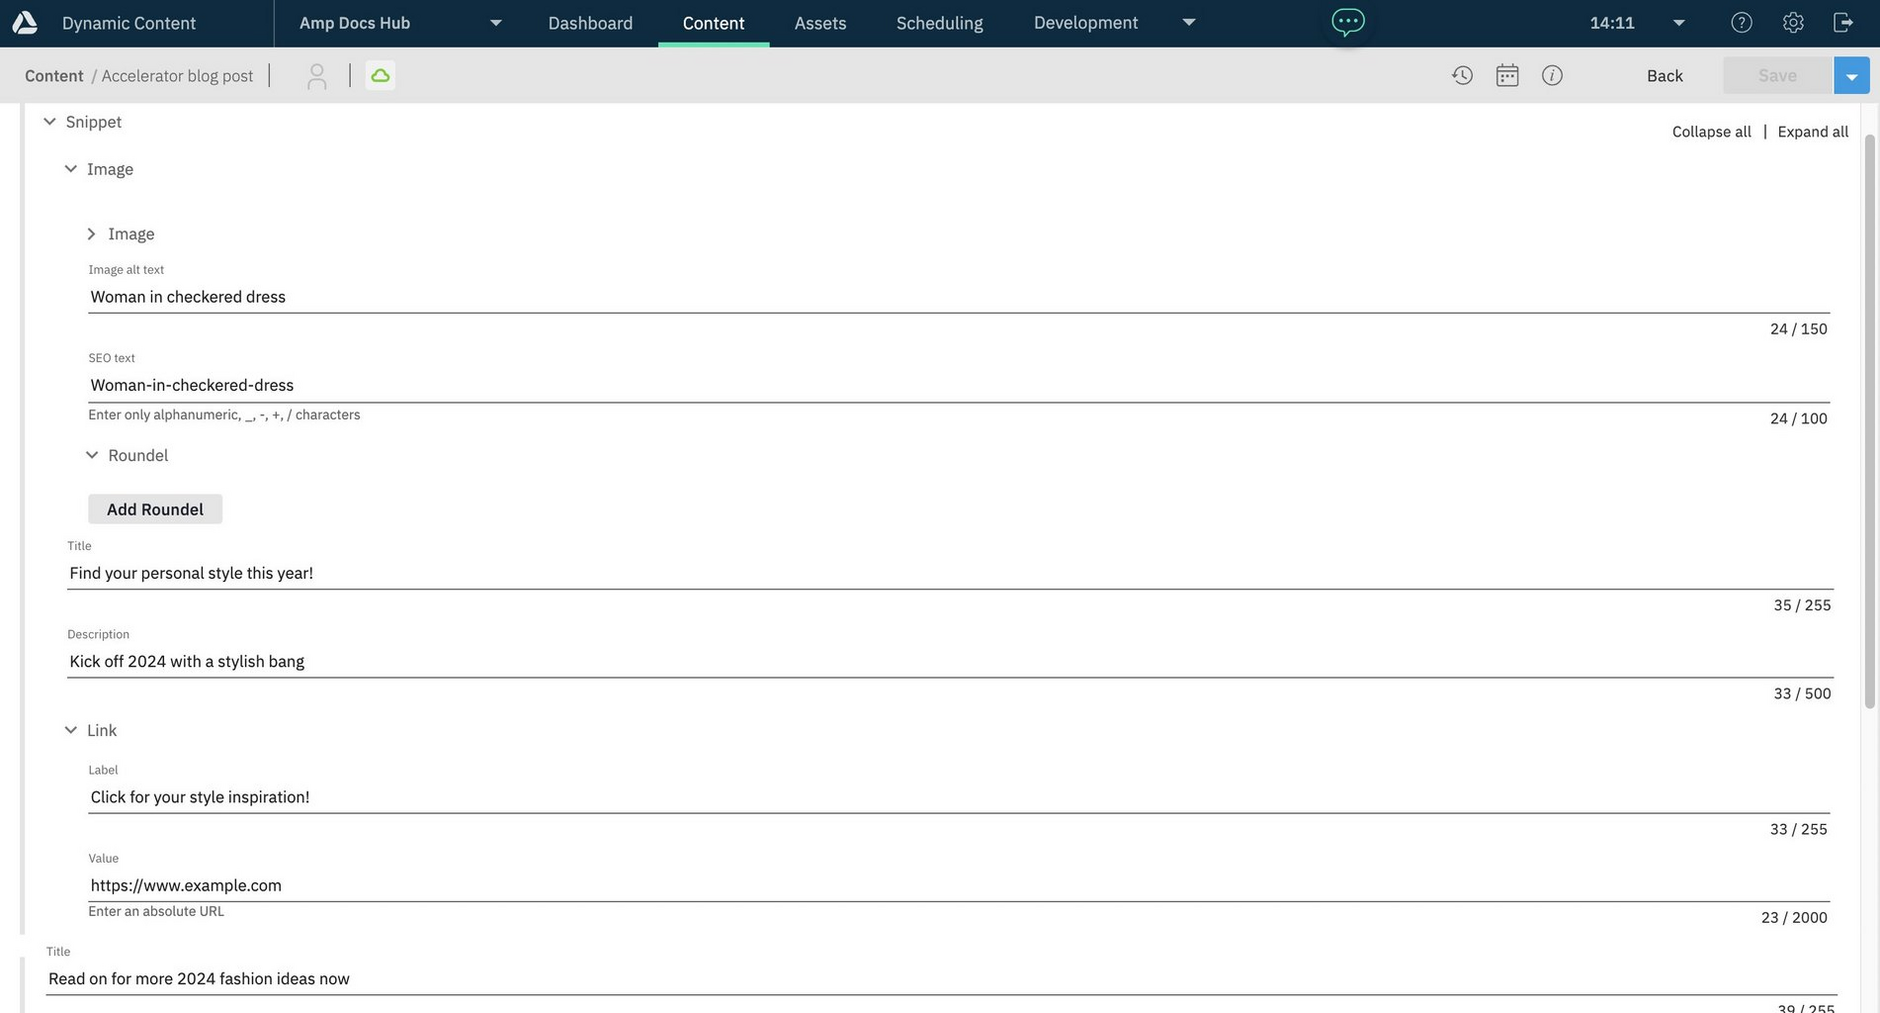
Now we can fill out all the necessary fields in our Accelerator Blog Post to create our content.
Name and save your content item to ensure it triggers the webhook you created. You can update your content item by changing any of the fields and saving your changes.
Step 5: View the resultsLink copied!
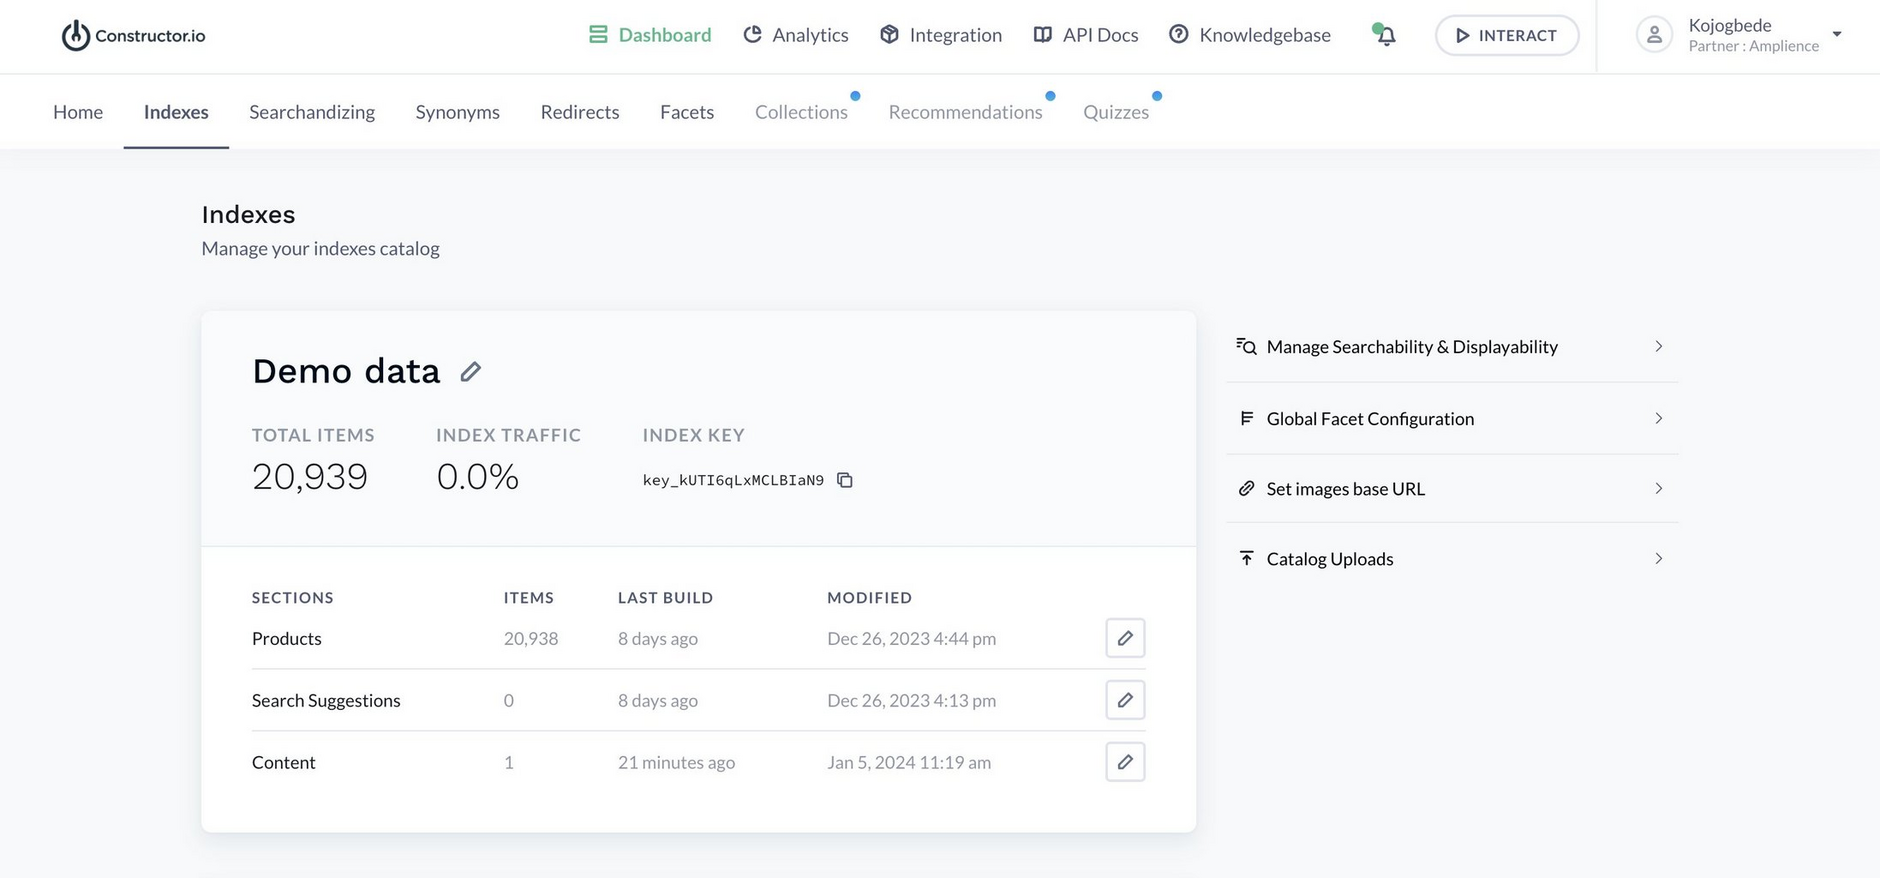
The screenshot below shows that now a new content item has been created in Dynamic Content, our Constructor.io dashboard is updated with a new content tab.
When we click on this tab, we can see all the data related to the new content item in Dynamic Content.
Step 6: View the webhook activity logLink copied!
Use the webhook activity log to verify the status of your webhook. To do this, choose "Webhooks" from the Development menu and double click your Constructor.io webhook to open it. Click the "Activity log" tab and in the "Recent deliveries" section you should see a new entry showing whether the webhook has been successfully triggered or not.
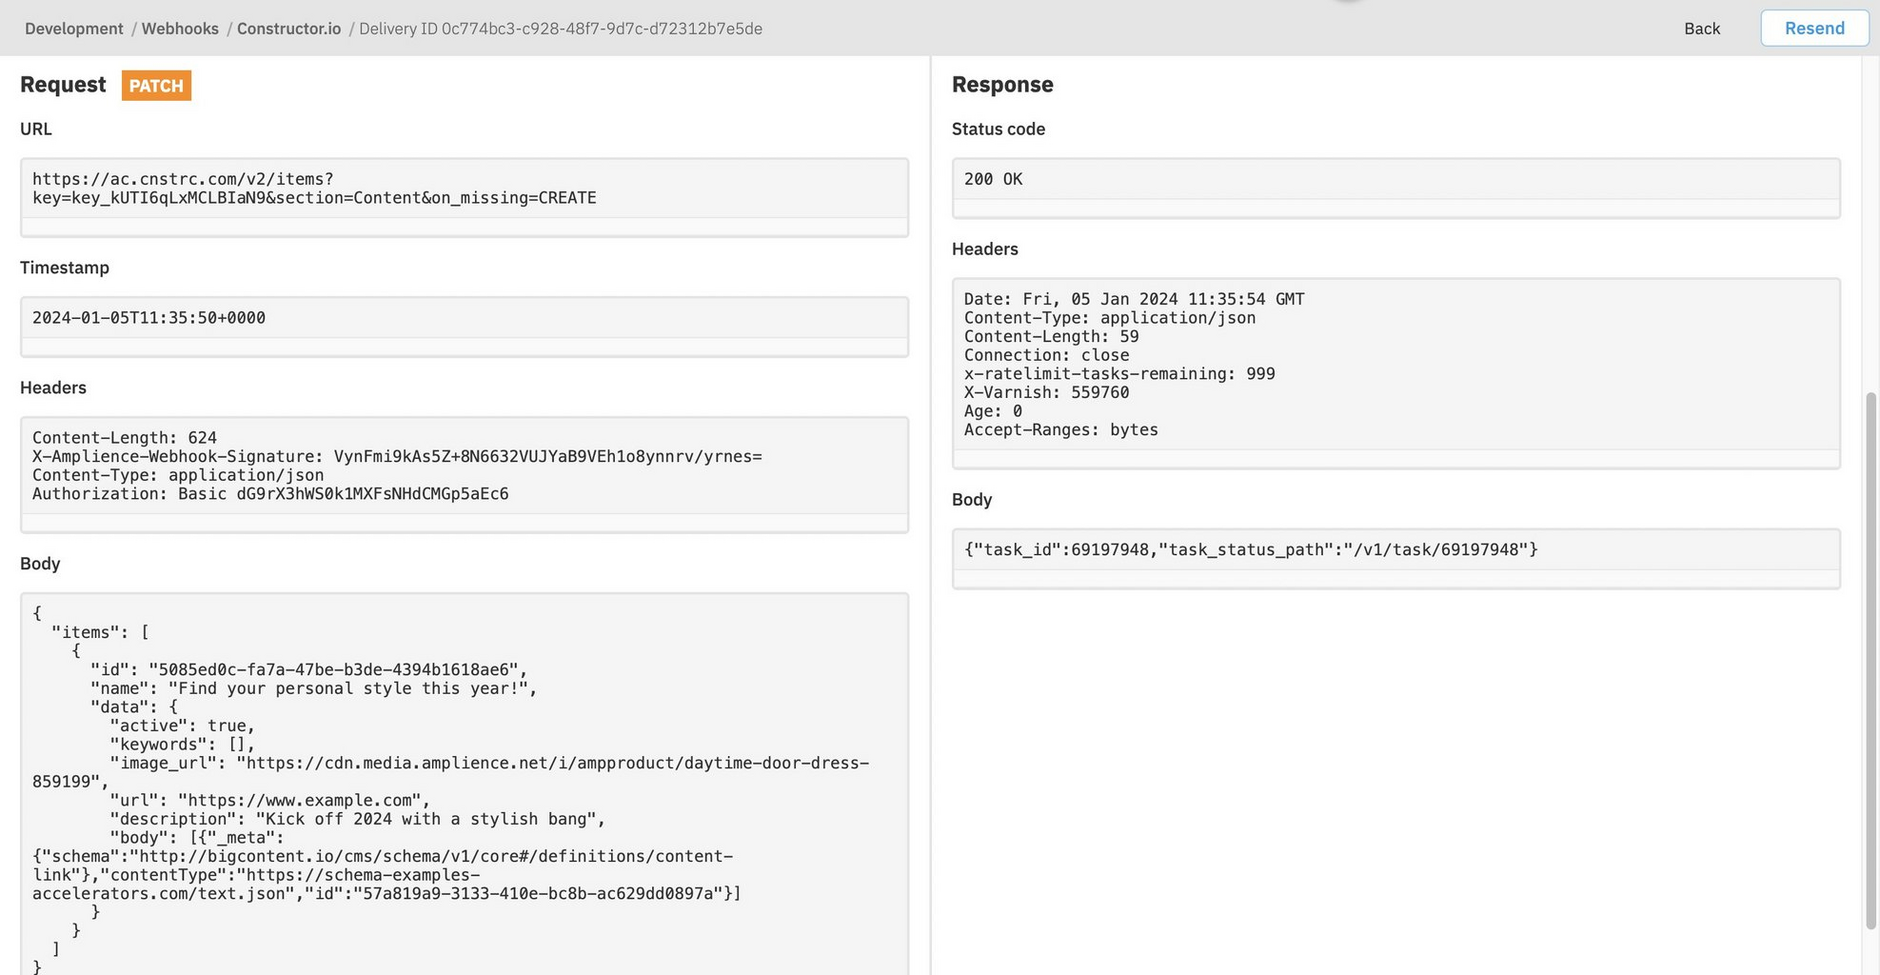
Click "View details" to view the request and response.
In the webhook details, the status is 200 OK, indicating that the webhook was received and processed.
